Set up your availability in Navigate so that students can schedule appointments to see you.
Notes:
- For optimum performance, please use Chrome or Firefox.
- Locations and services are created by administrators.
- You can have as much availability as needed.
- Two additional options: copy time and delete time.
Bookmark the Navigate Login in your browser, or log in from the Faculty & Staff website (Navigate is listed under both "Faculty Tools" and "Employee Tools").

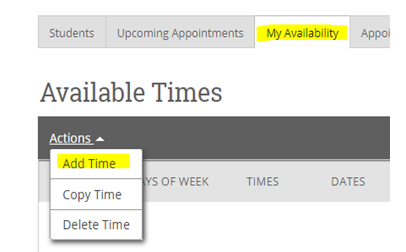
- Click on the "My Availability" tab.
- Click the "Add Time" button in the "Actions" menu.

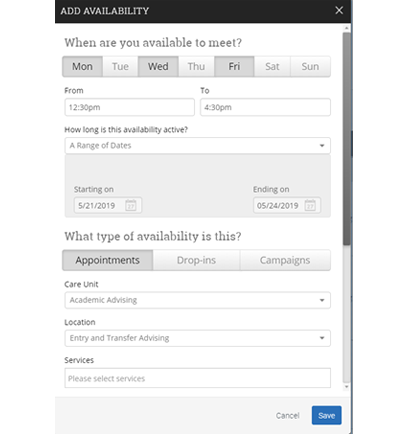
- Select the days on the top.
- Select the times when you are available to meet with students on those days.
- Select whether you will meet with students via appointments or drop-ins during that time. The campaign option is reserved specifically as dedicated time for targeted students to make appointments with you.
- Choose the time span for your availability (setting the entire term availability is recommended).
- Choose the location where you will be available during these dates and times.
- Lastly, select which student services you can provide to students during this availability. Note: Leaving this student services field empty means you will appear to be available for all advising services.
- Click the "Save" button.
Repeat this process until all of your availabilities have been defined.
Copy Time: to copy a time, select the time you would like to copy and then click the "Copy Time" button. The availabilities will be copied and a dialog will open allowing you to make edits or to save your newly created availability.
Delete Time: to delete your time, simply select the time and click the "Delete Time" button.
Note: You must set available time for each day if times vary.

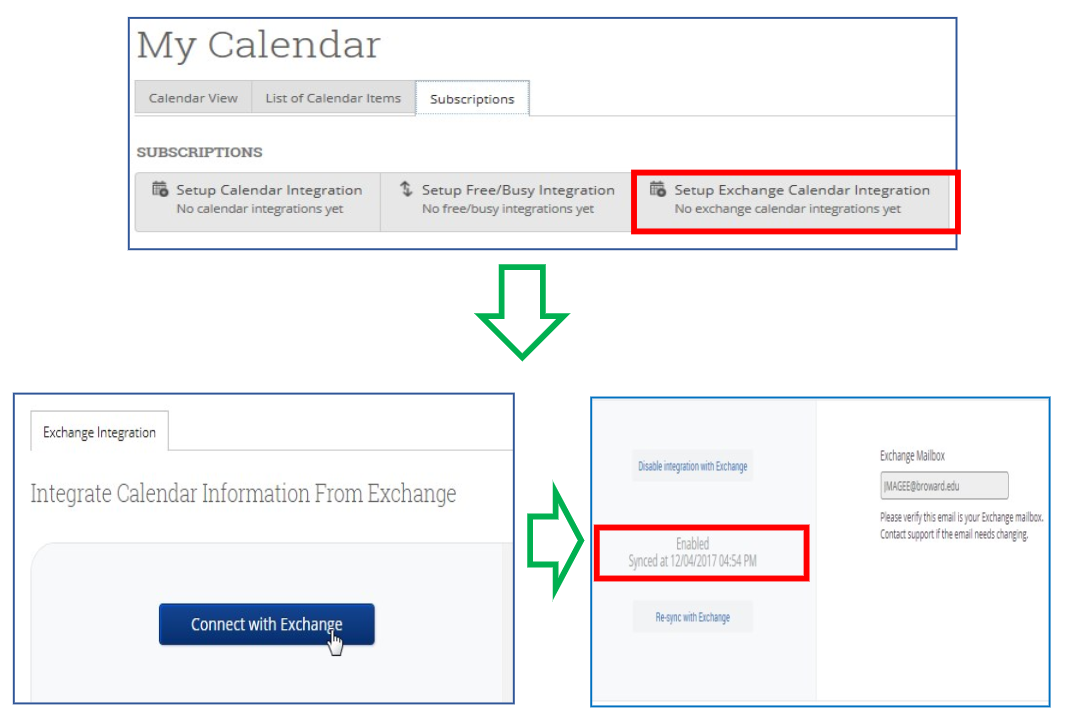
- Click on the "Calendar" tab.
- Select the "Subscriptions" tab.
- Select the third option, "Setup Exchange Calendar Integration."
- Follow the prompts to connect the calendar integration.
